Media management
The information found on this page is also reflected in the video below:
The Media module of the CMS contains all the documents you have uploaded. Think of images, pdf files, videos and more. The Media module is a standard module of every iWink website.
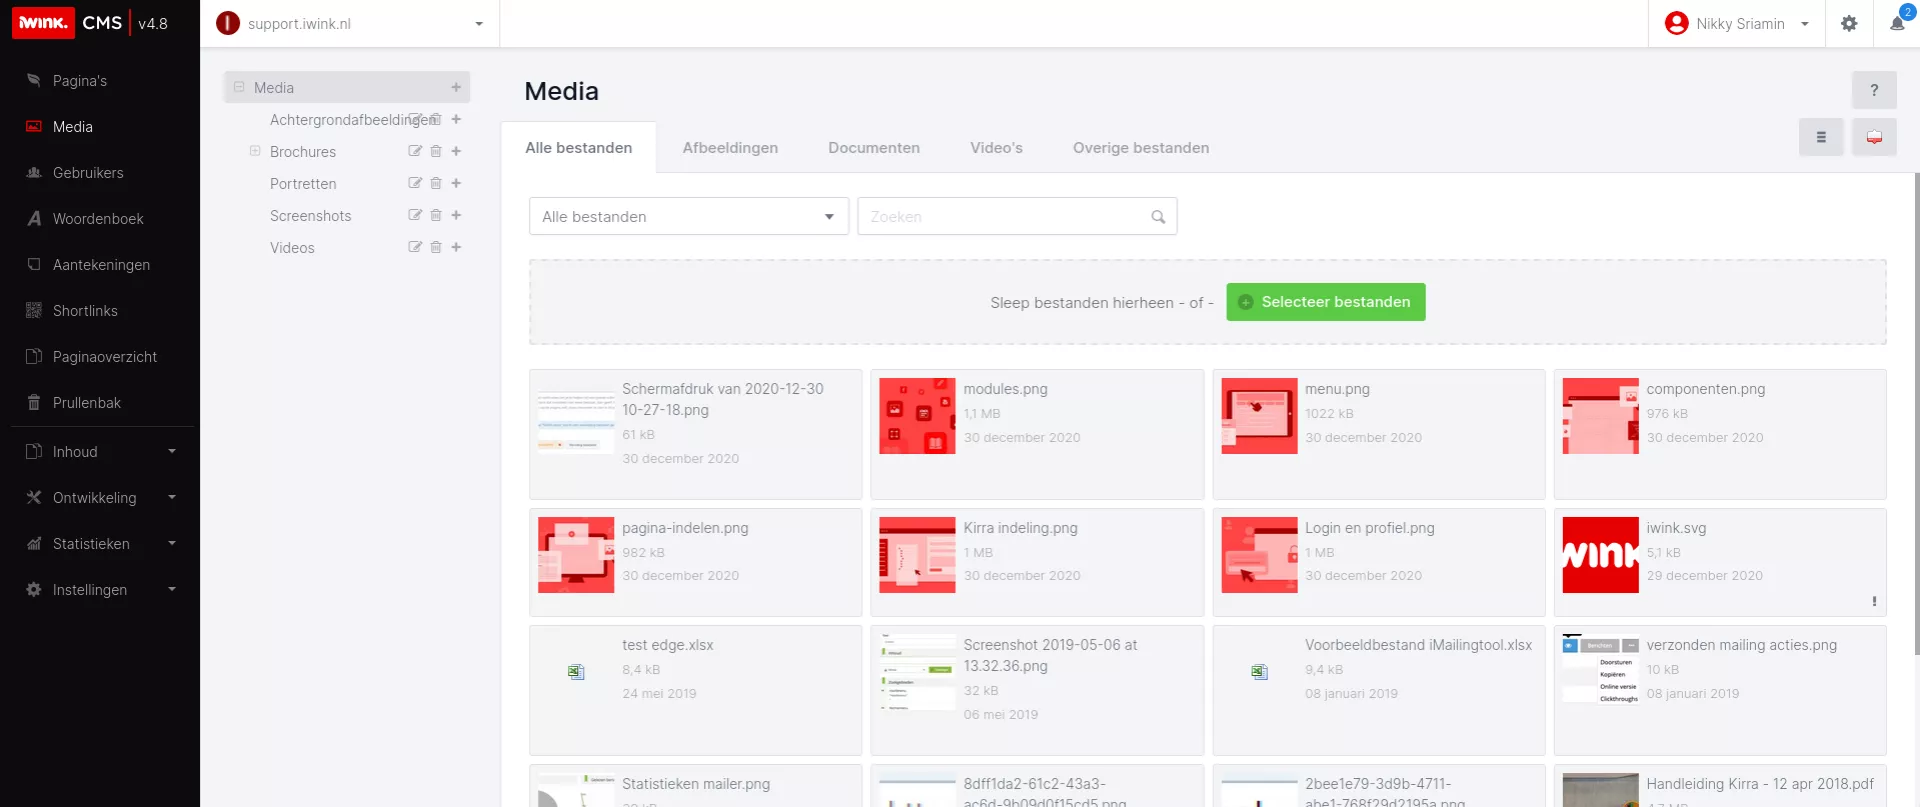
In the module itself, you will see a folder structure in the light-grey menu bar on the left. You can use this to structure media, but it is not mandatory. The white main window offers search and filtering options at the top. Also note the handy grey buttons on the right to sort this information differently or to switch between list and block view. The list view offers options to do actions on multiple files (move to a folder or delete).
Under the search bar you will find an option to add files. There you can drag and drop files or click the green button to select files from your computer. It is also possible to upload several files at once.
If you hover your mouse over a file, you will see options to delete or edit it.
Add files from a page or module
Adding files is usually done where a file is needed, rather than the module itself. Think of adding an image to a page.
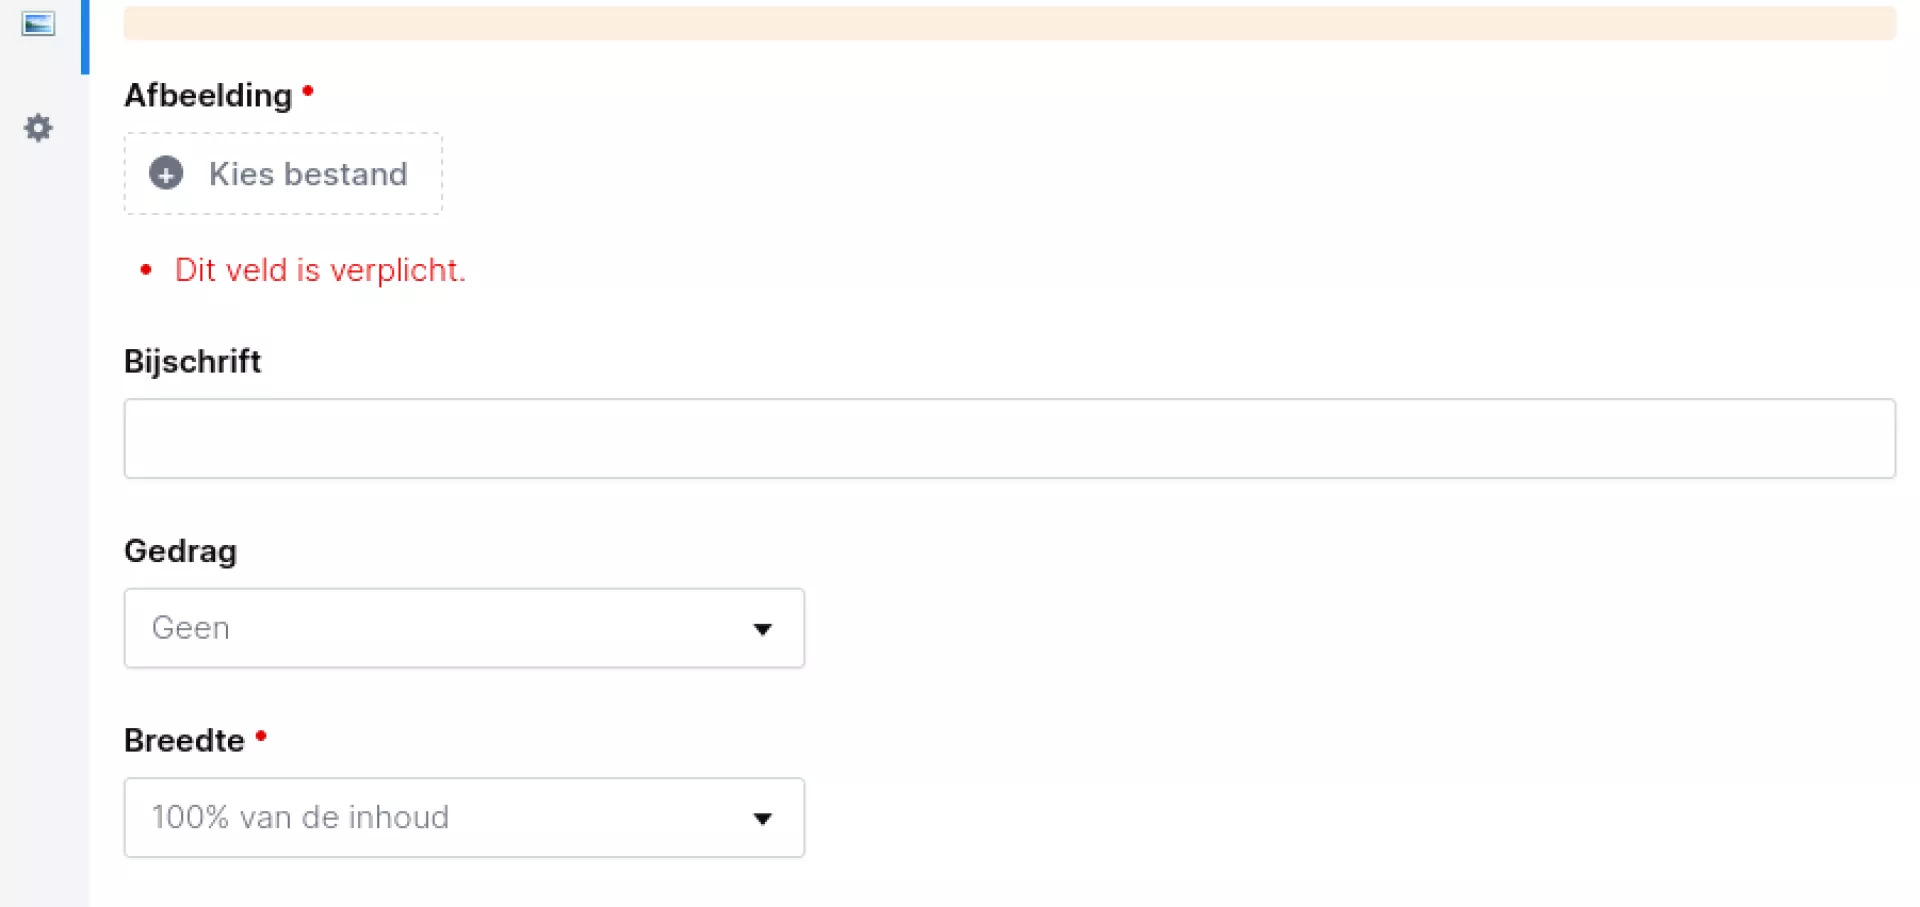
For some components, you can add media. For example, with an image or download. In those cases you will see a button to choose a file from the media manager or upload it there.
Tip: To save storage space in your hosting package, it can be useful to size files down before placing them on the website.
Manage files
When you click on a file from the overview, you get more information and actions for that file.
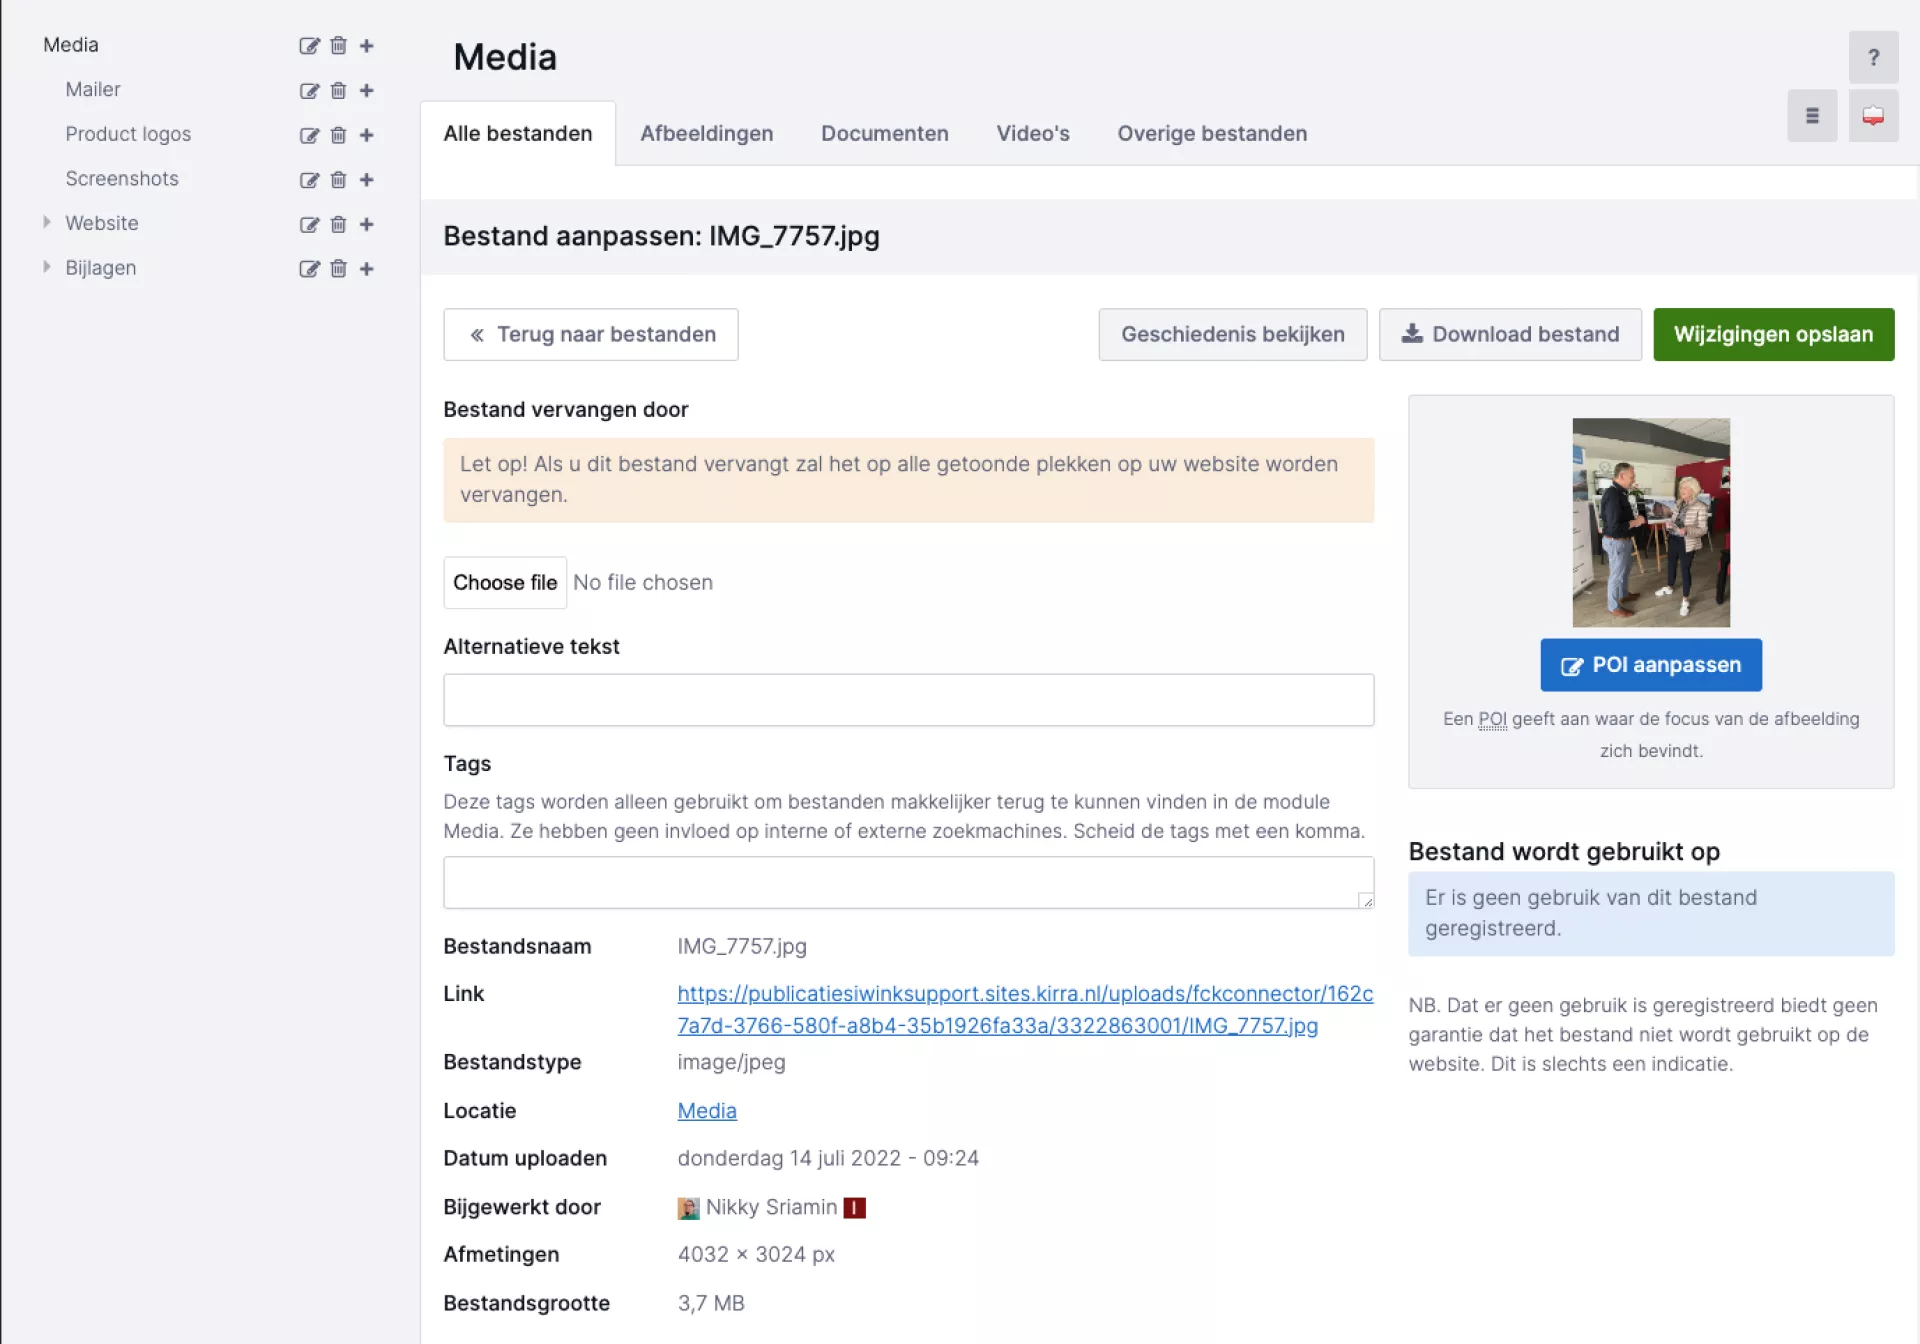
Left of the page we see from top to bottom:
- Back to files: button to go back to the view you just came from.
- Alternative text: Here you can enter text that will be read out by screen readers before the image to improve the accessibility of your website.
- Tags: you can use these to find files quickly in media management.
- File name: The file name as uploaded in the CMS.
- Link: A direct link to the source file. You can use this if you want to share the source file with someone or download the file.
- File Type: The type of file, for example: JPG, DOC, XLS.
- Location: The folder in media management.
- Updated by: This is the Kirra account that last updated the file.
- Sizes: In the case of an image, here is the size in pixels.
- File size: The size of the file on the hard disk.
Right of the page we see from top to bottom:
- Buttons for saving changes and downloading the source file
- A preview of the file (provided a thumbnail is possible)
- For images: an "Edit image" and "Modify POI" button (see explanation below)
- List of pages on which this file has been spotted. Please note that this is an indication and this list may be incomplete.
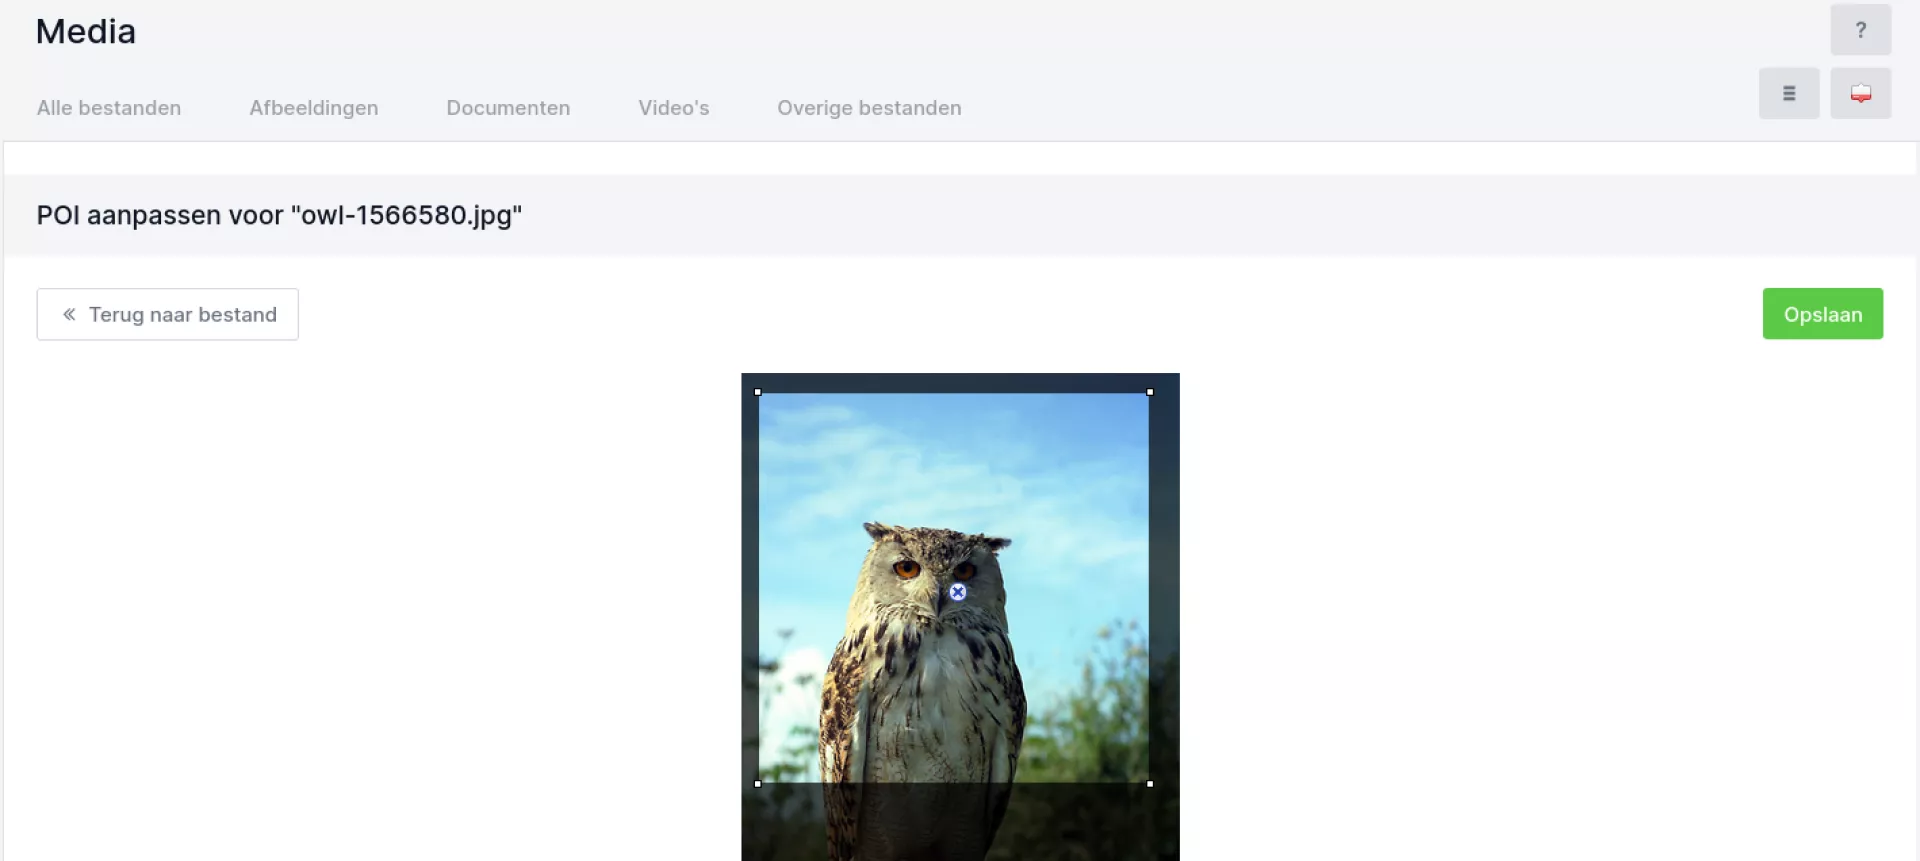
Customise POI
By setting a Point of Interest (POI), you tell the CMS where an important part of a photo is located. For example, the eyes of a portrait photo. This ensures that the CMS can take that into account when images are cropped. For example, think about the formats of a news overview, news detail page and an entry on the home page.